Computer-use & browser
NomiFun gives the agent two optional system-level capabilities. Computer-use lets it screenshot, synthesize mouse/keyboard input, and enumerate/focus windows — seeing and operating your whole desktop. Browser-use drives Chromium through a homegrown, in-process Rust CDP engine to navigate, read, click, and fill forms. Both are exposed as native tools straight to the model, so they’re faster, cheaper on tokens, and finer-grained to govern than bolt-on alternatives.
Both are high-privilege capabilities. In the desktop app (nomifun-desktop) they compile in and default to on; you can switch either off in system settings at any time. The headless web/server build (nomifun-web) promises neither desktop control nor a hosted browser.
Find them in system settings: Computer Use (/settings/computer-use) and Browser Use (/settings/browser-use).
Steps
-
Open computer-use settings. Go to
/settings/computer-use. Desktop builds default to on; flipping the switch off persists to your preferences, and later sessions won’t get the capability. Under the hood it’s a single tool with anactionparameter — screenshot, move/click, type, scroll, drag, list windows, focus window, and so on (~21 actions). Screenshots and UI recognition ride the platform’s native accessibility stack: AX + Vision OCR on macOS, UIA + Media.Ocr on Windows, AT-SPI2 on Linux.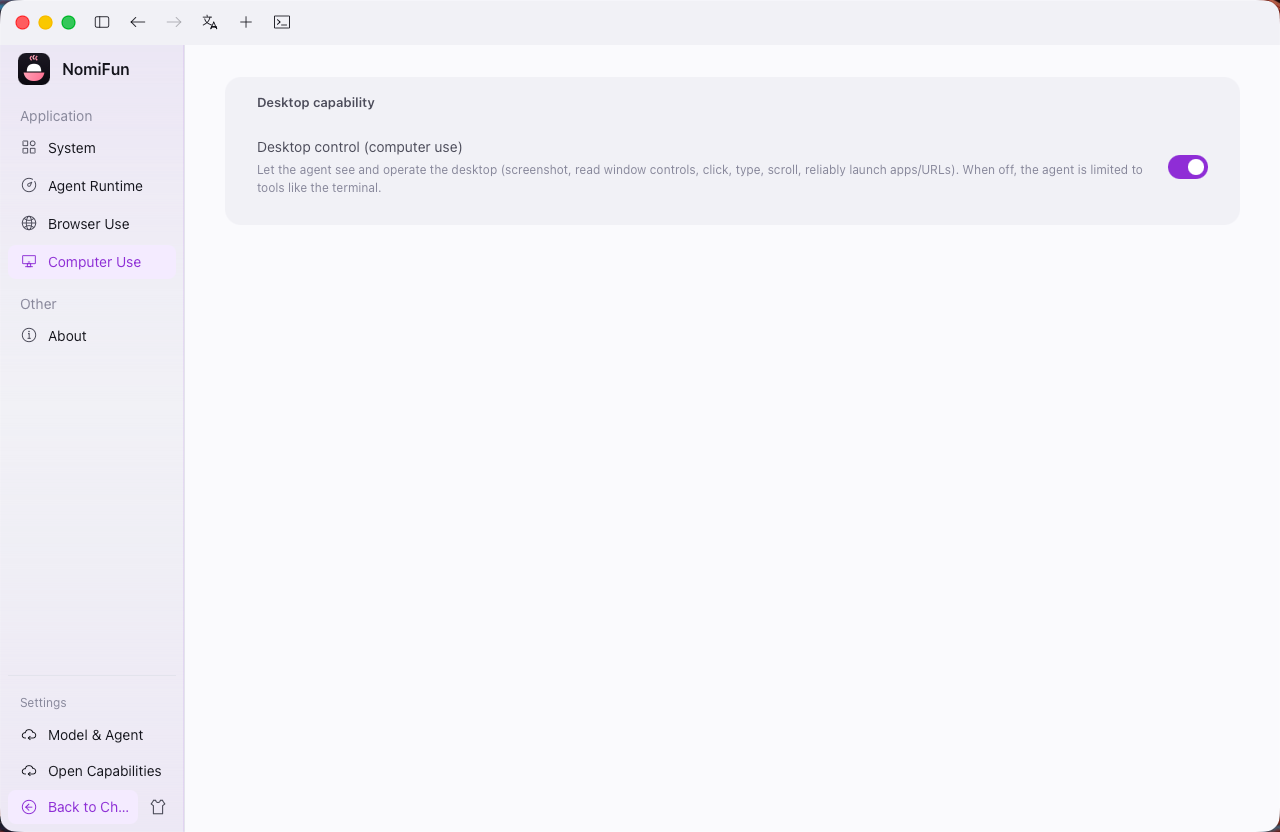
-
(macOS only) Grant system permissions. First use of computer-use needs you to authorize the host app under System Settings → Privacy & Security:
- Accessibility — required to synthesize mouse/keyboard input and read the accessibility tree.
- Screen Recording — required for screenshots (check this first if a screenshot comes back black or fails).
When a permission is missing the tool result tells you exactly what to grant — do it, then retry.
-
Open browser settings. Go to
/settings/browser-use. Same story: default on, switchable off. The browser is exposed as a singleBrowsertool whose ~32 actions cover navigation, observe/snapshot, click, type, wait, and more. On first use the engine auto-acquires Chrome for Testing (downloaded and unpacked into the engine’s own user-data-dir, so it never touches your everyday browser) — no Node, npm, or Playwright required.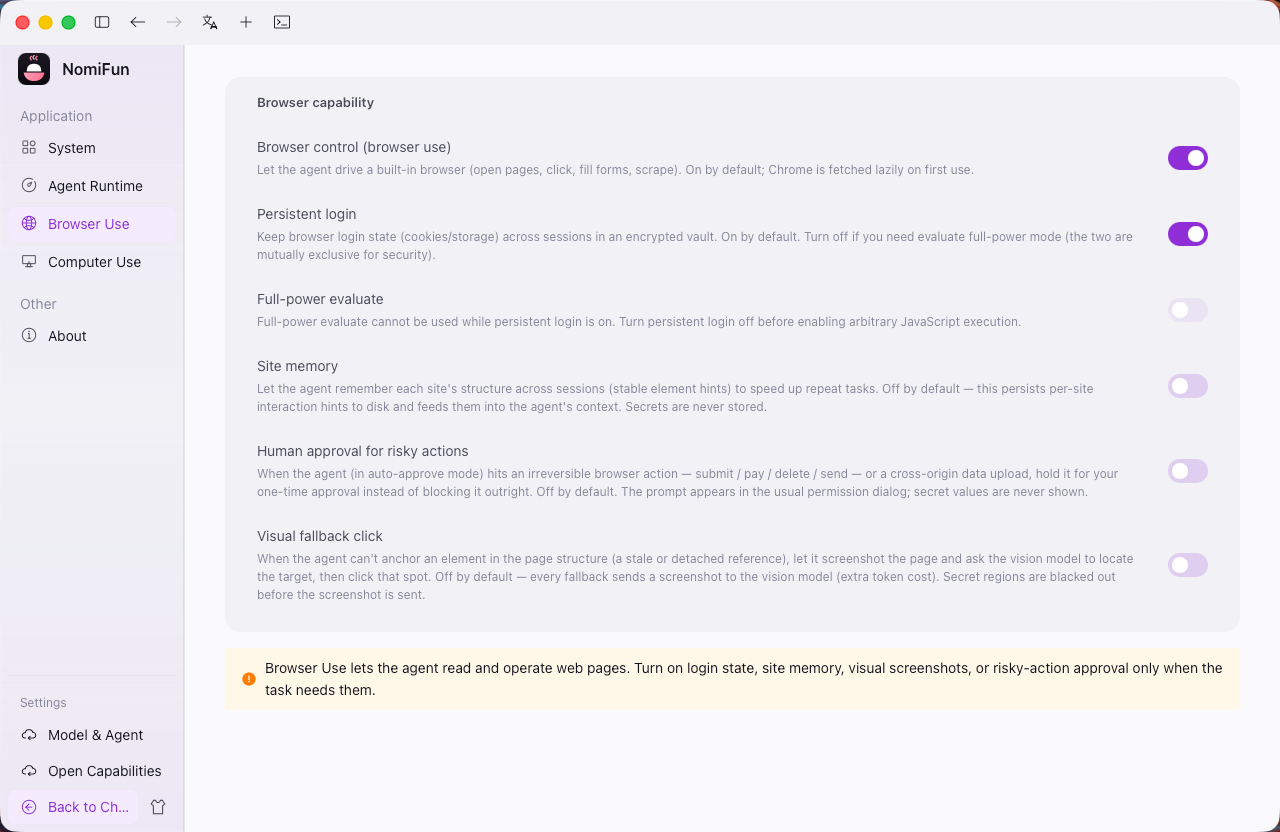
-
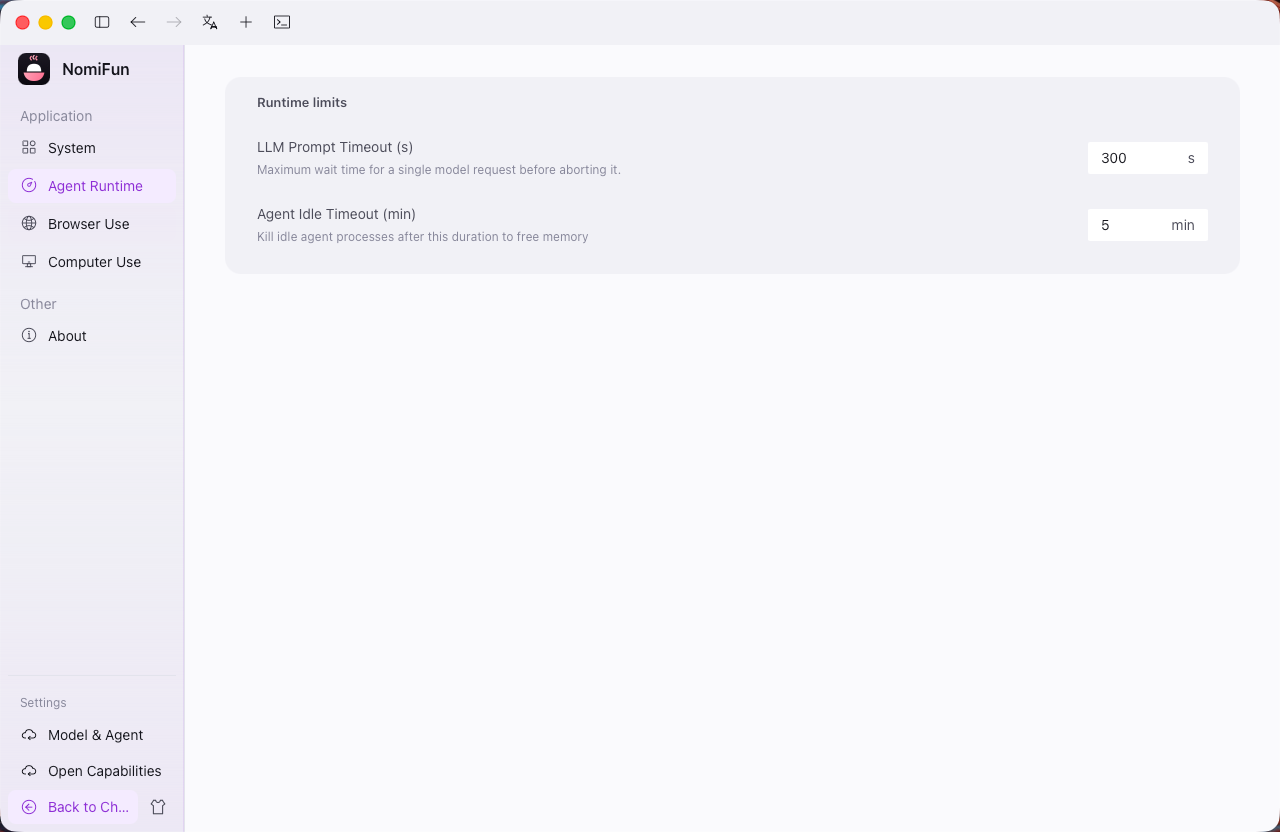
(Optional) Tune defaults per session or host. Beyond the global switches in system settings, you can toggle both capabilities for a specific session from the agent runtime settings, alongside token-governance knobs like the screenshot long-edge cap and how many recent images to keep in history.
-
Put the agent to work. Hand it tasks in plain language (“open this page and fill out the form”, “take a screenshot and tell me what’s on screen”). The recommended loop is: screenshot to observe → act → screenshot to verify.
Notes & boundaries
- Three-axis capability gateway. Every action is classified through DangerTier × Surface × Decision, so governance is fine-grained rather than all-or-nothing.
- Read-only vs. write approvals. Read-only actions (screenshot, cursor position, list windows, wait, the browser’s
observe/snapshot) are Info class — auto-allowed in AutoEdit/Default mode. Acting actions (click, type, scroll, drag, focus window, browser navigation/forms) are Exec class — Default mode asks you to confirm first. - Plan mode never touches the desktop. During read-only planning the computer-use tool is hidden entirely, so nothing operates your desktop while planning.
- Screenshots & token governance. Screenshots are auto-downsampled so the long edge stays under your cap (default 1568px, within the recommended vision range), and the model’s coordinates are mapped back to the real screen (Retina scaling included). Only the most recent few image results are kept in history; older images are stripped at the end of a turn (their text stays), keeping session files and request tokens from ballooning.
- The build decides availability. The desktop app ships both capabilities; the headless web/server build doesn’t compile computer-use (no display) and doesn’t enable a hosted browser. Misconfiguring computer-use there only logs a warning rather than erroring.
FAQ
- Screenshot comes back black or fails? On macOS it’s almost always missing Screen Recording permission. Grant it, restart the host app, and retry.
- Do I have to install Chrome or Node myself? No. The browser engine auto-acquires Chrome for Testing on first use, kept separate from your everyday browser, with no Node/npm/Playwright needed.
- Can I still add community MCP browser/desktop tools? Yes. The built-in computer-use and native browser don’t block you from adding any community server in MCP settings — the tool names differ, so they don’t collide.
Related
- The session workspace — how the file tree, preview, and a session invoke these capabilities.
- MCP & skills — wire up external tools alongside the built-ins.
- Intelligent decisioning · IDMM — add decision-watch escort to a long-running task.
Full docs → GitHub