Your first conversation
This page walks you through your first NomiFun session: set up a model provider, start a conversation from the home screen, then inspect the output in the conversation workspace. Finish Installation first.
The desktop app (nomifun-desktop) and the self-hosted web server (nomifun-web) share the same UI. The difference is auth: the desktop WebView is trusted via a local token on every launch (no login), while nomifun-web listens on 127.0.0.1:8787 and requires login by default. For a first run, use the built-in nomi agent — a CLI binary bundled with the app, so no external CLI install is needed. It’s the simplest way to verify everything works.
Where to look: model setup lives in the sidebar at
/models, sessions start from the home screen at/guid, and an active session is at/conversation/:id.
Steps
-
Configure a model provider. Before sending your first message, you need at least one working model. Open
/modelsand add a native provider — Anthropic, OpenAI-compatible, Amazon Bedrock, or Google Vertex — with its API key, base URL, and default model id.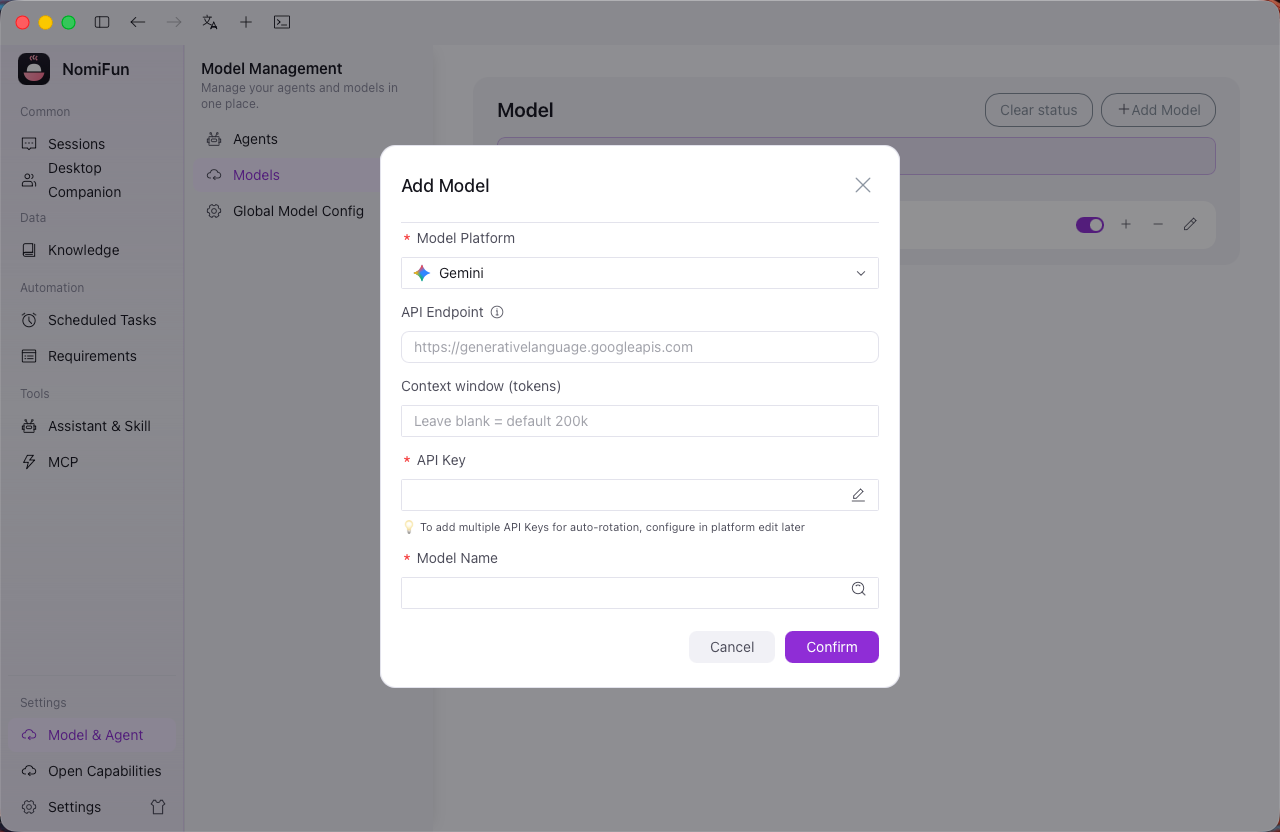
-
(Optional) Set up a model failover queue. For unattended long tasks, you can compose a failover queue in model settings: when a model fails, gets rate-limited, or becomes unavailable, the engine cycles through backups in order, switching up to 4 times before giving up. You can skip this for a first run — one working model is enough.
-
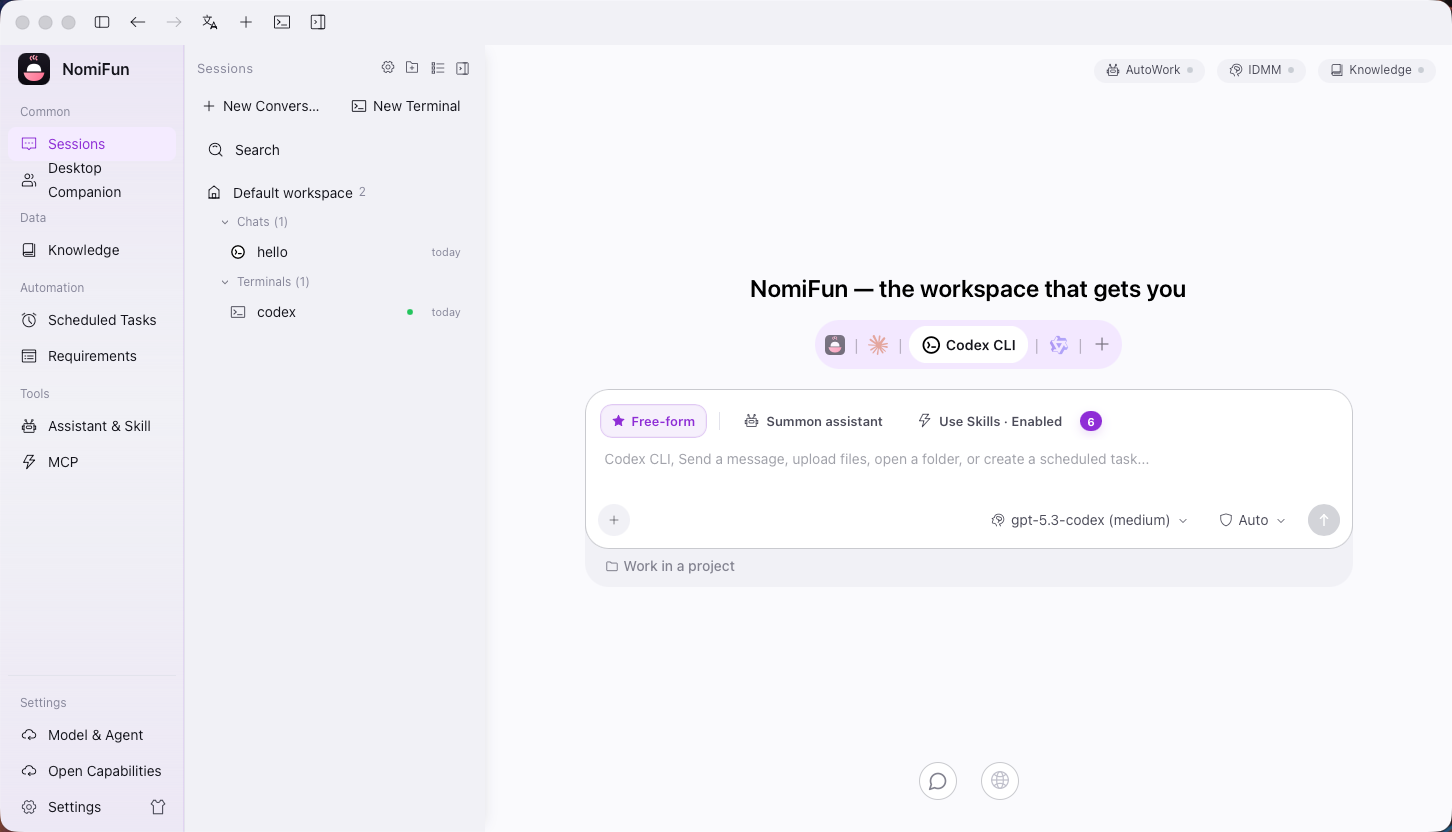
Start your first session from the home screen. Go back to
/guid. The home screen gathers everything you need to begin: the agent picker, the model picker, an assistant (a preset persona / system prompt / skill bundle), tools & workspace, and the input box. Pick the built-in nomi engine, choose the model you just configured, and type your first prompt in the input box, for example:Write a Python function that returns the nth Fibonacci number, with a small test.
Press send. NomiFun creates a new session, navigates to
/conversation/:id, and starts streaming the reply. While typing you can use@to reference a file, skill, or assistant.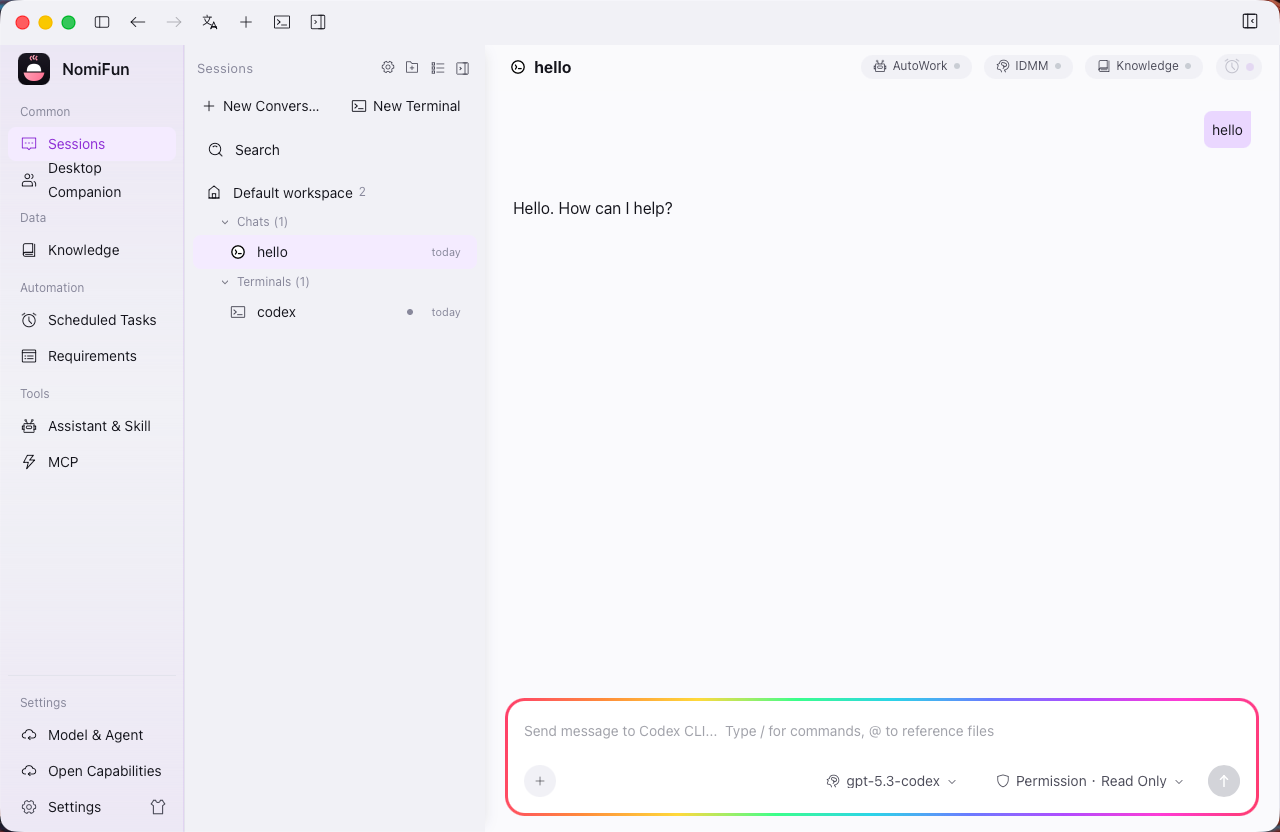
-
Use the conversation workspace. Every session has its own working directory. The session page typically has four areas:
- Message stream — model replies, tool calls, file changes, and execution status.
- File tree — the files in this session’s working directory.
- Preview panel — preview code, Markdown, PDF, Office, HTML, and diffs.
- Terminal — a PTY terminal mounted at the working directory, launched from within the session.
Ask nomi to write that function to a file, then check the result in the file tree and preview panel.
Notes and limits
- Built-in nomi vs. external agents — the built-in nomi needs no external CLI and works out of the box. If you switch to an external agent such as Claude Code, Codex, or Gemini, you still have to install the matching CLI on the host yourself;
/modelsonly handles model credentials and selection — it won’t install third-party CLIs for you. - Memory and skills boundary — all companions share one memory capture / learning pipeline (a shared memory hub), while the skill library is isolated per companion — each companion has its own skill set. Per-companion private memory is coming soon.
- Login difference — the desktop app requires no login; on the web, the first visit guides you through creating an admin account, after which login is required.
FAQ
- First message won’t send? Usually the model isn’t configured yet, or the chosen agent and model don’t match. Re-check that the provider is healthy in
/models, then select it again in/guid. - Want a different look? NomiFun ships 3 pure-code SVG companion characters (Mochi the mochi rabbit / Ink the black cat / Bolt the robot, with Mochi as the default) and supports any custom IP. Adjust it in
/nomi.
Related
Full docs → GitHub